- Nintendo 3DS motherboard replacement guide
Step 1 — Back Cover
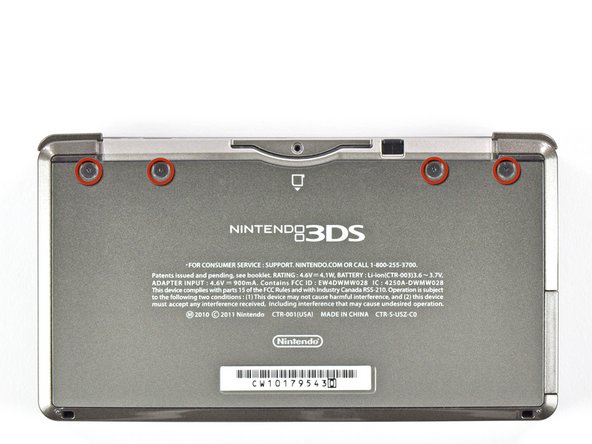
- Unscrew the four Phillips #00 screws along the top of the back cover.
- The screws are held in place by locking washers, and will not come out of the back cover.


Step 2
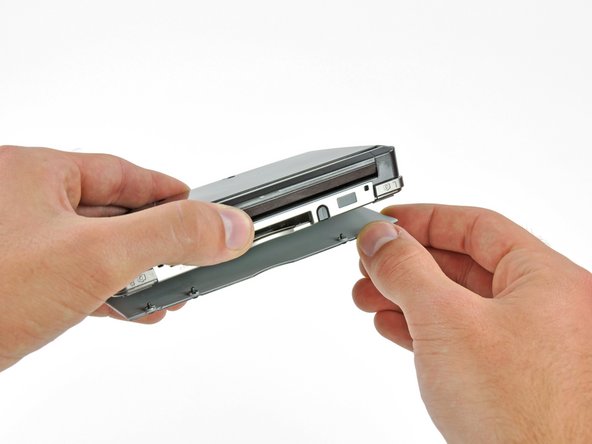
- Hold the device in one hand and turn it over.
- Grab the top edge of the back cover with your opposite hand so that the cover does not fall back into place.
- Flip the 3DS over again so that the back cover is facing up.
- Pull the back cover up and away from the rest of the device to remove it.


Step 3 — Battery
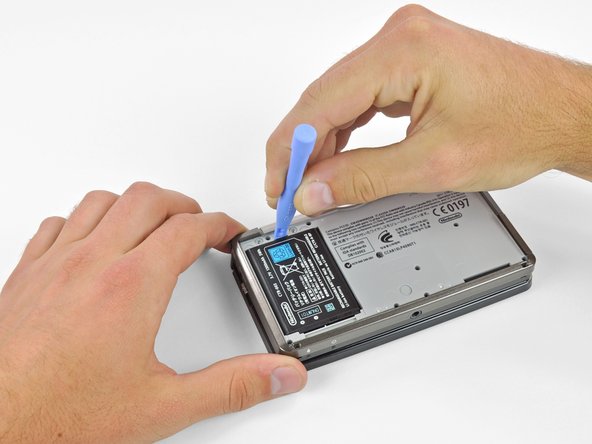
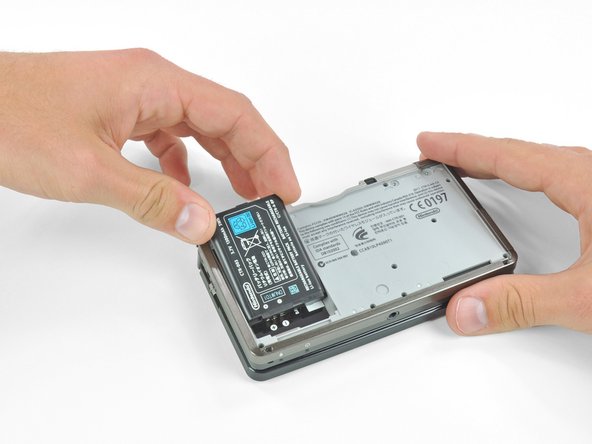
- Insert a plastic opening tool into the notch in the lower case above the battery.
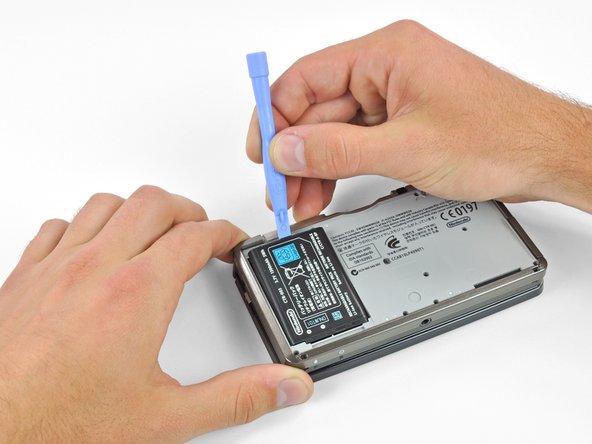
- Pry the battery up with the plastic opening tool.
- Grab the top edge of the battery and lift it out of the lower case.
Step 4 — Lower Case
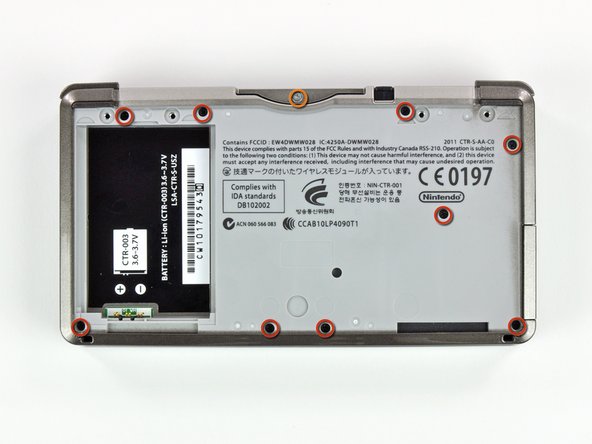
- Remove the nine 6.3 mm black Phillips screws from the lower case.
- Remove the 2.4 mm silver Phillips screw above the game cartridge slot.


Step 5
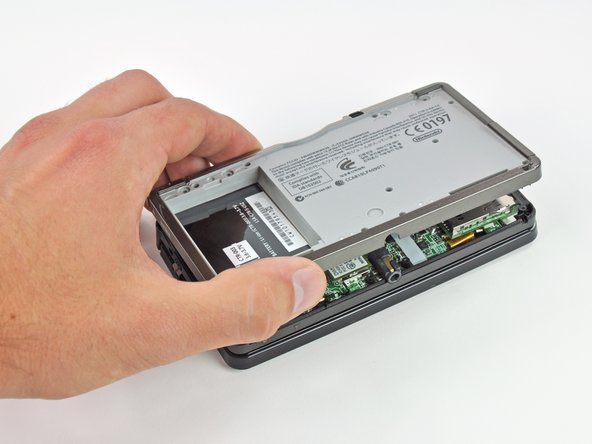
- Lift the bottom edge of the lower case off the rest of the 3DS.
- There are still two ribbon cables connecting the mother board to the case, so be sure not to pull the lower case all the way off.
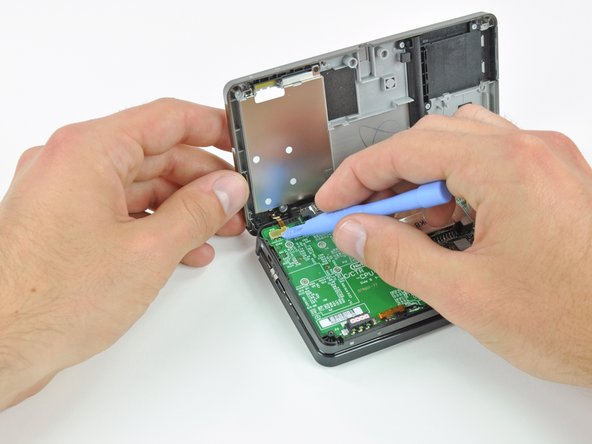
- Use a plastic opening tool to pry the shoulder button ribbon cables off their sockets on the motherboard.
- Remove the lower case from the device.
Step 6 — Circle Pad Joystick
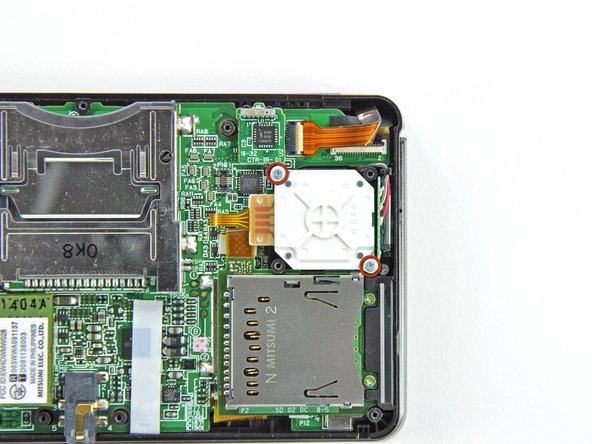
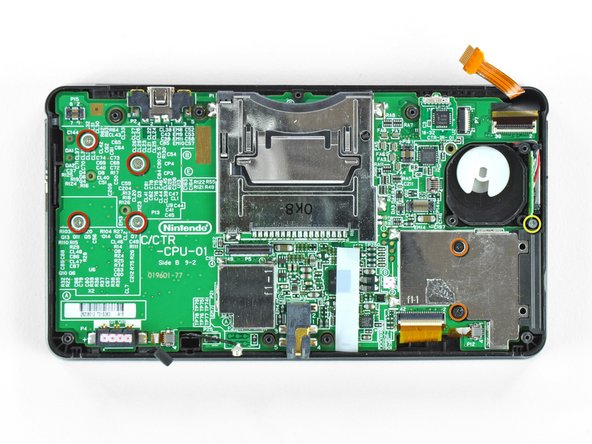
- Remove the two 7.7 mm Phillips screws securing the back of the Circle Pad to the motherboard.


Step 7
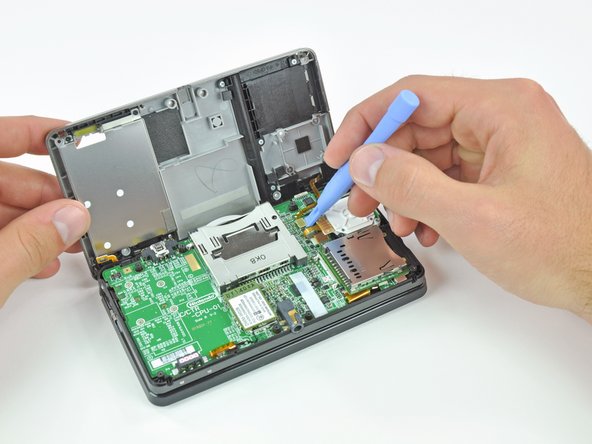
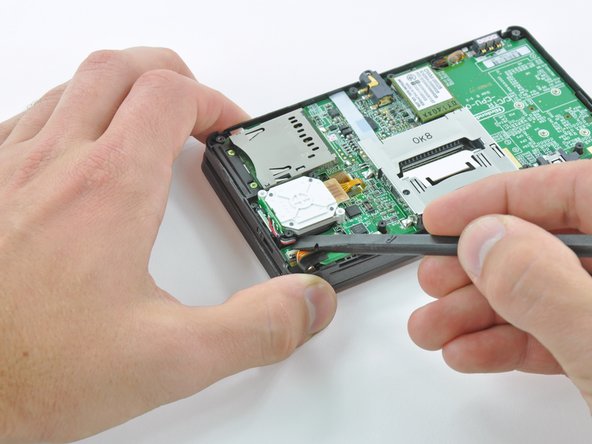
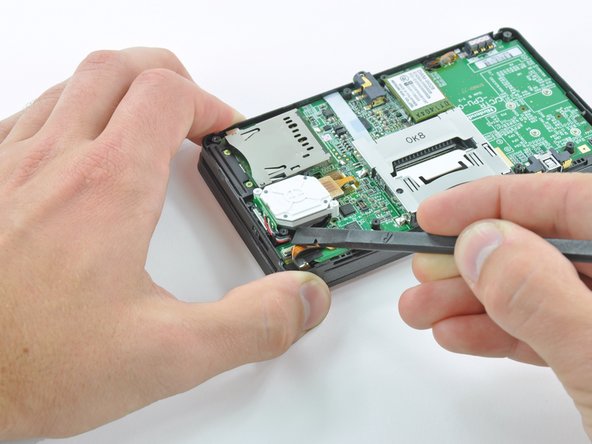
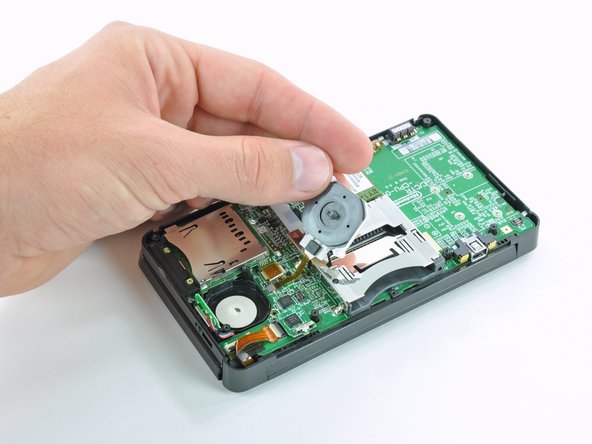
- Use the flat end of a spudger to pry the back of the Circle Pad off the motherboard.
- Lift the Circle Pad joystick off the motherboard and lay it on its back so that the ribbon cable connector is accessible.


Step 8
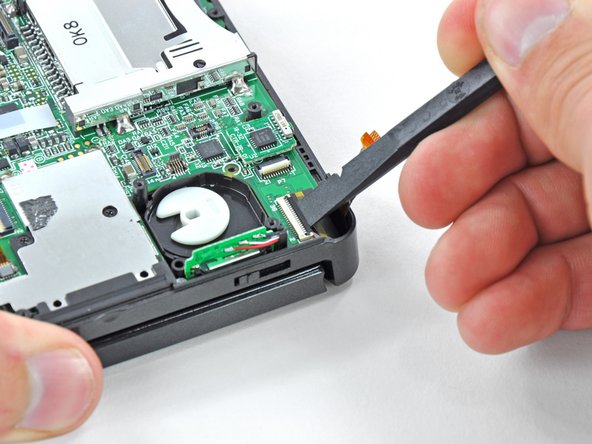
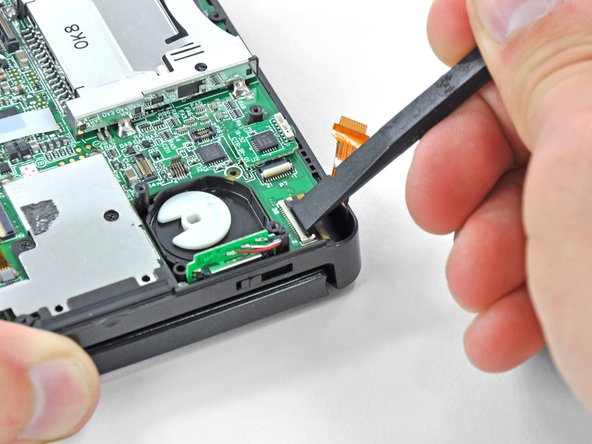
- Use the flat end of a spudger or your fingernail to flip up the retaining flap on the Circle Pad ribbon cable ZIF socket.
- Be sure you are prying up on the hinged retaining flap, not the socket itself.
- Lift the Circle Pad joystick off the motherboard.


Step 9
- To decrease the chance of losing it during repairs, you may want to remove the two thin pads underneath the Circle Pad joystick.
- Use a spudger or screwdriver to lift the pads up and remove them from the device.
Step 10 — SD Board
- Remove the two 4.5 mm Phillips screws securing the SD board to the motherboard.


Step 11
- Use the flat end of a spudger to pry the SD board ribbon cable connector off its socket on the motherboard.


Step 12
- Insert the flat end of a spudger between the SD board and the motherboard.
- Run the spudger along the sides of the SD board to free it from the adhesive pad holding it in place.
- Once completely freed, lift the SD board straight off the motherboard.


Step 13 — Wi-Fi Board
- Slide the flat end of a spudger under the corner of the Wi-Fi board, and lift it away from the motherboard.
- The Wi-Fi antenna cable is still connected to the Wi-Fi board, so you cannot completely remove the Wi-Fi board yet.


Step 14
- Lift the Wi-Fi board off the motherboard and rotate it so that the bottom side is facing up.
- Use the flat end of a spudger to pry the Wi-Fi antenna cable connector off its socket on the Wi-Fi board.
- Remove the Wi-Fi board from the device.


Step 15 — Motherboard Assembly
- Grasp the microphone ribbon cable near the microphone with a pair of tweezers.
- Pull the microphone straight up out of the upper case.


Step 16
- Use the flat end of a spudger or your fingernail to flip up the retaining flap on the speaker assembly ribbon cable ZIF socket.
- Be sure you are prying up on the hinged retaining flap, not the socket itself.
- Disconnect the speaker assembly ribbon cable with a pair of tweezers.


Step 17
- Use the flat end of a spudger or your fingernail to flip up the retaining flap on the camera ribbon cable ZIF socket.
- Be sure you are prying up on the hinged retaining flap, not the socket itself.


EditStep 18
- Remove seven Phillips screws securing the motherboard to the upper case:
- Four 2.5 mm gold screws
- Two 3.5 mm black screws
- One 2.5 mm silver screw
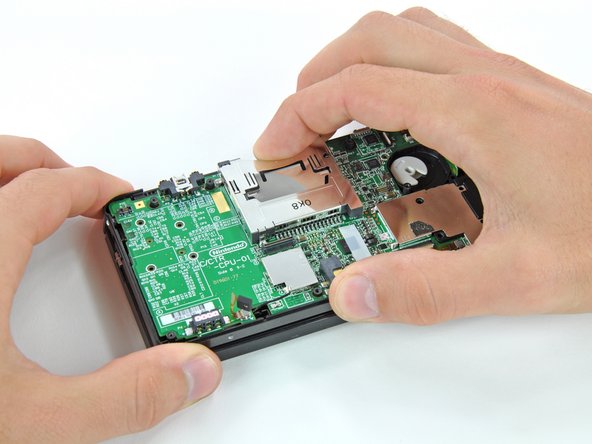
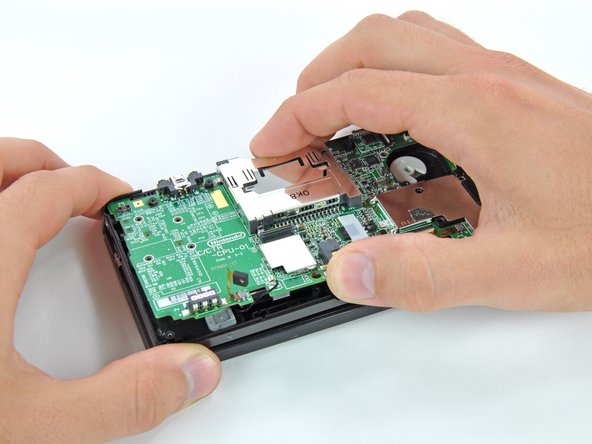
- Lift the side of the motherboard that sits along the bottom edge of the 3DS.


EditStep 19
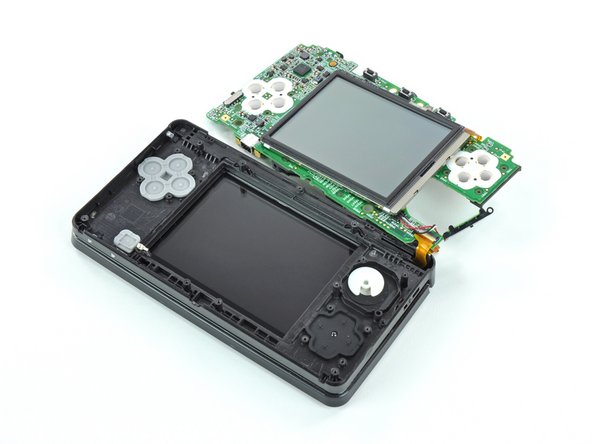
- Continue lifting the motherboard assembly and rotate it until it is resting next to the rest of the device.
- Use the flat end of a spudger or your fingernail to flip up the retaining flap on the LCD ribbon cable ZIF socket.
- Be sure you are prying up on the hinged retaining flap, not the socket itself.


EditStep 21 — Lower Display Assembly
- Set the motherboard assembly down so that the lower LCD is side-by-side with the motherboard.
- Use the tip of a spudger or your fingers to peel back the white tape covering the touchscreen ribbon cable connector.


EditStep 22
- Use the flat end of a spudger or your fingernail to flip up the retaining flap on the touchscreen ribbon cable ZIF socket.
- Be sure you are prying up on the hinged retaining flap, not the socket itself.


EditStep 23
- Use the flat end of a spudger or your fingernail to flip up the retaining flap on the lower LCD power ribbon cable ZIF socket.
- Be sure you are prying up on the hinged retaining flap, not the socket itself.
- Pull the ribbon cable out of the connector with a pair of tweezers.
- Grasp the ribbon cable as close to the connector as possible with the tweezers to avoid tearing it.


EditStep 24
- Use the flat end of a spudger or your fingernail to flip up the retaining flap on the lower LCD data ribbon cable ZIF socket.
- Be sure you are prying up on the hinged retaining flap, not the socket itself.


EditStep 26 — Microphone
- Use the flat end of a spudger or your fingernail to flip up the retaining flap on the microphone ribbon cable ZIF socket.
- Be sure you are prying up on the hinged retaining flap, not the socket itself.


EditStep 28 — Volume Switch
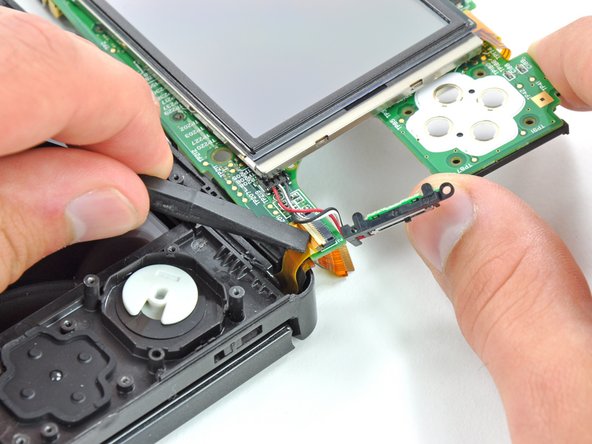
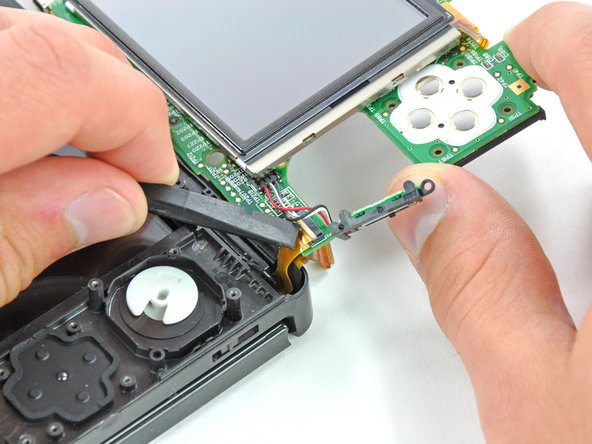
- Turn the motherboard over.
- Use the flat end of a spudger to pry the volume switch connector out of its socket on the motherboard.






No comments:
Post a Comment